
ArangoDB v2.8 reached End of Life (EOL) and is no longer supported.
This documentation is outdated. Please see the most recent version here: Try latest
Set up your ArangoDB Cluster
Setting up a cluster can be intimidating task. You have to deal with firewalls, ports, different types of machines, and the like. ArangoDB is prepared to deal with all kinds of different setups and requirements.
However, in the following section we concentrate on a standard setup and show you, how to build a ArangoDB cluster within minutes. If you want to dive deeper into the nasty details, you should read about Sharding.
Development Scenario
While not really relevant for a production environment, a common setup for development is to create a cluster on a single machine. This is the easiest of all setups and you should be ready to play with a ArangoDB cluster in less than a minute. Even when developing it is convenient to create a cluster on a single machine instead of having to deal with a lot of servers.
Step 1: Enable the Cluster mode
In order to enable the cluster mode, edit the configuration file as root
vi /etc/arangodb/arangod.conf
and change the lines
[cluster]
disable-dispatcher-kickstarter = yes
disable-dispatcher-frontend = yes
to
[cluster]
disable-dispatcher-kickstarter = no
disable-dispatcher-frontend = no
Save and restart
/etc/init.d/arangodb restart
Step 2: Setup your Cluster
You can now configure your cluster. A cluster consists of a number of database server and coordinators. A database server holds your precious data, while a coordinator talks to the outside world, takes requests from clients, distributes them to the database server, and assembles the result.
For this example, we assume that are creating three database servers and two coordinators.
Use your favorite web browser and go to
http://localhost:8529/
You will now see the cluster management frontend.
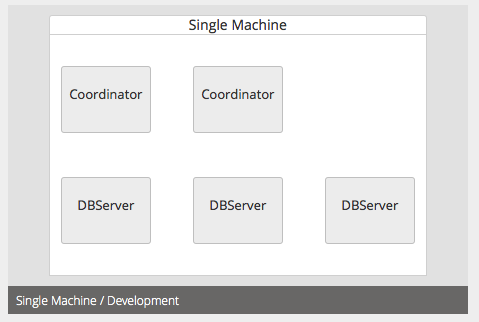
Select Single Machine scenario. The next page allows you to enter the number of coordinators and database servers.
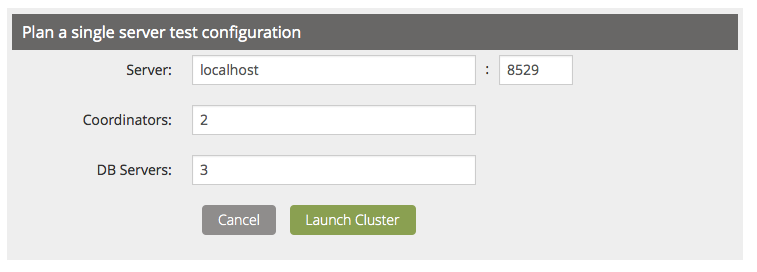
Press Launch Cluster to fire up the cluster. That’s it. Your cluster is up and running.
Step 3: Test your Cluster
Click on one of the coordinators (e. g. “Claus”) to access your cluster. In order to create a sharded collection, use Tools / JS Shell and execute
JSH> db._create("users", { numberOfShards: 3 });
JSH> db.users.save({ _key: "cmeier", firstName: "Claus", lastName: "Meier" });
Congratulations! You have created your first sharded collection and stored a document in it.